
Many Windows 10 users have complained about 100% disk usage during system startup. This issue has happened to most Windows 10 users even I’m bothered by it too. 100 disk usage or memory usage can happen due to many reasons in which waasmedic agent exe is also a reason.

Whenever you open Chrome or any program on your PC and you see high CPU usage on the task manager. Then I can understand how frustrating this is as your system unresponsive and take too much time to start any application. Sometimes you have to be forced to restart your system.
So, today we will see “why waasmedic agent exe is responsible for high CPU and Disk usage” and “how to completely fix this problem?”
Table of Contents
What is WaasMedic Agent exe and How Does it Work?
WaasMedic Agent Exe is an application of Windows Update Medic Service also called WaaSMedicSvc which is located in Windows/System32 folder and executed by svchost.exe -k wusvcs -p process. It is a vital part of the Windows 10/11 operating system that enables remediation and protection of windows update components.
This service comes with many supporting DLL files such as WaaSMedicCapsule.dll, WaaSMedicPS.dll, WaaSMedicSvc.dll, WABSyncProvider.dll.
Whenever Microsoft releases an update for your windows. Waasmedic service ensures that all updating services are enabled and provides a smooth and uninterrupted environment to complete the windows updating process.
Could WaasMedic Agent exe also be a Virus?
Some Third-party Antimalware programs may report the waasmedic agent exe as a virus or malware. But it is not a virus nor any other malware. It is a genuine windows service digitally signed by Microsoft Corporation.
If any programmer or hacker made a malware such as Trojan or spyware that act similar to waasmedic agent service and the name is also the same. Then you may be mistaken in understanding that waasmedic service is a virus.
However, the chances of it happening is very rare because any kind of malware is immediately blocked if you have a good antivirus program.
How to Verify WaasMedic Ownership?
If you want to assure yourself that it is not a virus then you can Verify waasmedic agent exe Ownership via its Application and Processes.
Verifying WaasMedic Agent.exe Ownership via File Explorer
1. First, go to This PC and Open the Windows drive (Usually windows is installed in C: drive).

2. Then, head to the Windows > System32 folder and type WaaSMedicAgent in the Search field, and hit Enter.

3. After that, Right-click on the application and select Properties.
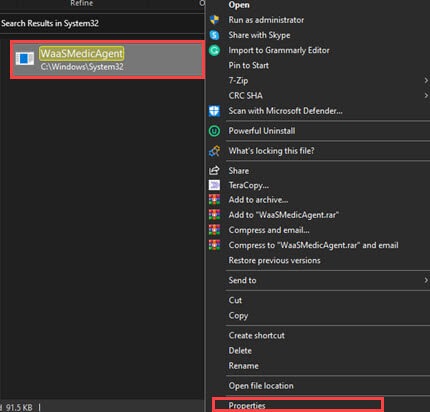
4. Now, go to Detail tab and check the Product name, Copyright, and Original filename.
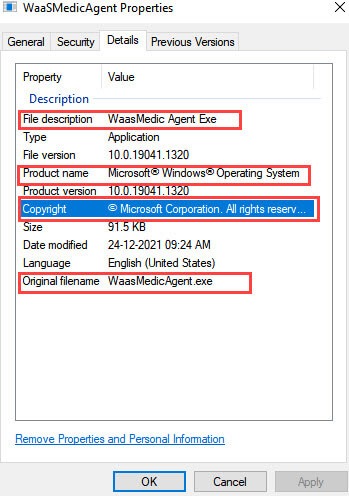
If you find the product is from Microsoft Corporation and the original filename is WaasMedicAgent.exe then it is a genuine application from Microsoft.
Verifying WaasMedic Process Ownership via Task Manager
1. Right-click on Taskbar and select Task manager or press Ctrl + Shift + Esc to open Task manager.
2. Now go to the Processes tab, find and Expand the wusvcs Process.

3. Then, right-click on wusvcs and select Properties.
4. Now, switch to Detail tab and check File description, Copyright, and Original filename.
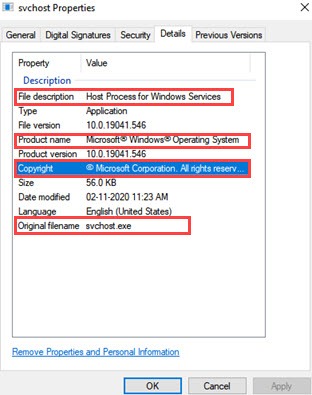
If you find the File description is for Windows, Copyright from Microsoft and original filename is svchost.exe. Then waasmedic service is a Microsoft Windows service.
Upgrade your Computer Hardware to fix WaasMedic Agent exe 100% Disk or CPU Usage
If you have checked waasmedic agent exe processes and services and you didn’t find anything wrong. Then you may need to upgrade your PC hardware. Most of the time 100% disk usage or high CPU usage is happen due to the slow read/write speed of your hard disk or insufficient amount of RAM in your system.
You can replace your Hard Disk Drive (HDD) with Solid State Drive (SSD) for fast data transfer and Read/Write speed. This helps to run your OS with 4 times more speed than your previous hard disk. As it results all windows processes and services are working very smoothly and no high disk usage issue occurred.
You can also add more RAM to your system to increase the memory read and write speed. So, no high CPU usage issue happens to your Windows.
How to Fix WaasMedic Agent Exe High Disk or CPU usage on Windows 10/11?
In your case, if you don’t need to upgrade your hardware means you have a high-end PC but still waasmedic agent exe slowing down your computer. Then there are many ways to fix this issue by changing the configuration of Windows settings.
Allow WaasMedicAgent exe process to Complete its Task
Whenever you start downloading and installing Windows updates. The waasmedic service is very active at that time to ensure no interruption occurs to the updating process and due to this, it uses high system resources and your system shows you 100% disk or CPU usage.
During the updating process, you need to be more patient as many windows services running in the background and it takes time to install windows update on your system. Internet connectivity also increases resource usage because many other services are active and updating their program in the background.
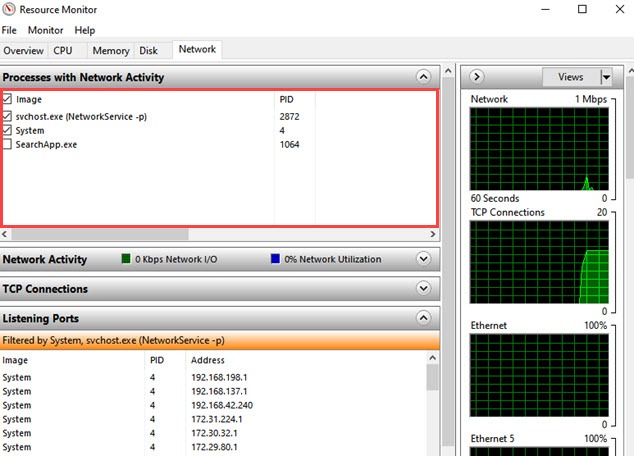
You can check your network activity with Resource Monitor to see which process uses an internet connection during windows updates.
Pause Windows Update and Fix WaasMedicAgent exe by Windows Update Troubleshooter
Continuously facing high resource usage is frustrating but you can easily fix this issue with Windows update troubleshooter if some other process prevents your system from updating your windows.
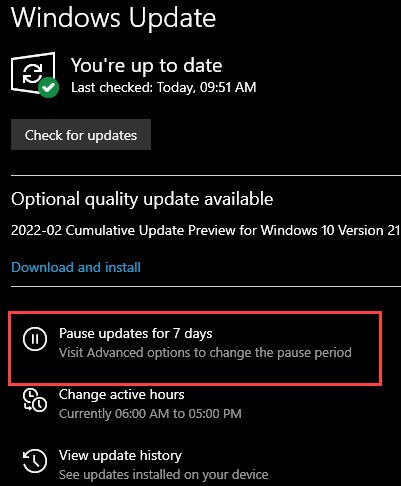
But before doing that you need to pause your windows update so waasmedic agent.exe service isn’t run in the background.
Go to Settings > Update & Security and click on Pause update for 7 days.
After that you need to run Windows update troubleshooter, just follow the steps to do this:
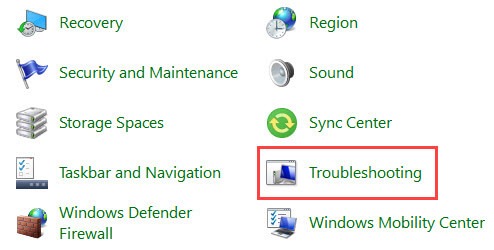
1. Open your Windows control panel and go to Troubleshooting.
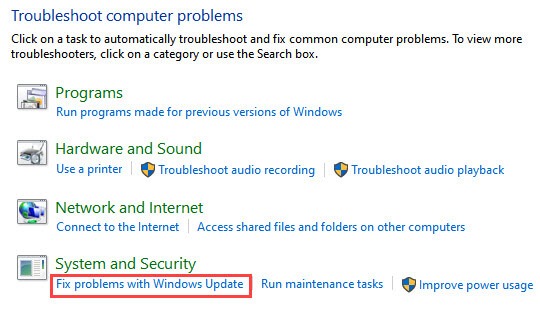
2. Now click on Fix problems with Windows Update under System and Security.
3. Then, click on Next to start the troubleshooter.
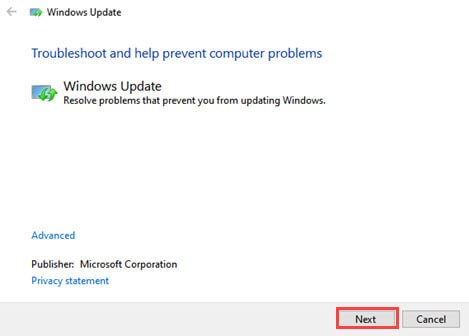
Windows update troubleshooter automatically fixes the issue If any windows update error is found.
Temporarily Disable Antivirus Program to solve WaasMedicAgent exe Issue
During the Windows updating process, antivirus scans each and every file that your windows download and install in your system. This results in High CPU and Memory usage which interrupts your updating process. If you have a low-end PC or laptop, it is better to disable your antivirus temporarily so your windows updating process is complete successfully.
If you’re using Windows Defender, follow the steps to temporarily disable its protection.
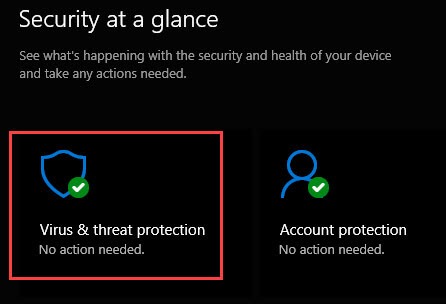
1. Open Windows Defender Antivirus program and click on Virus & threat protection.
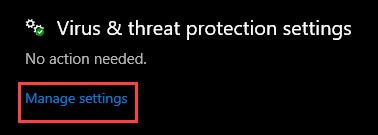
2. Now, click on Manage settings below the Virus & threat protection settings.
3. Then, Toggle off the Real-time protection.
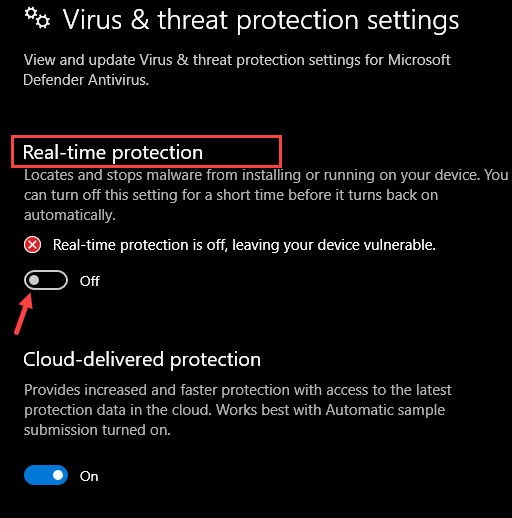
4. After updating the process, follow the steps again and Turn on the antivirus protection.
Cleanup System files to Fix WaasMedic Agent exe High CPU usage
After installation of a newer version of windows update. Windows keep a copy of all installed updates even older ones. While the windows updating process, sometimes this old copy of windows updates conflicting with new system update and causes waasmedic agent exe high CPU usage issue.
System files cleanup deletes all older versions of windows updates that you don’t need.
Follow the steps to clean up the system files:
1. Open This PC and right-click on C: drive and select Properties.
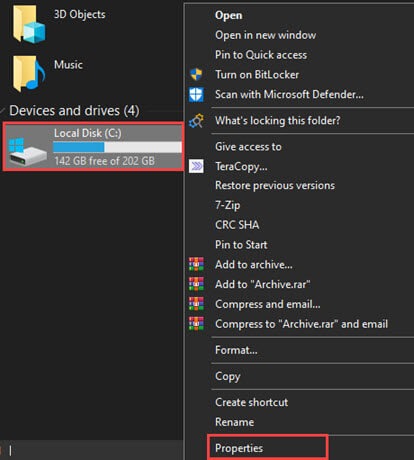
2. Then, click on Disk Cleanup and then click on Clean up system files.
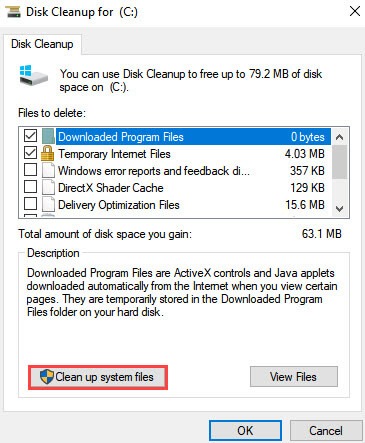
3. After that, click on OK to start the process.
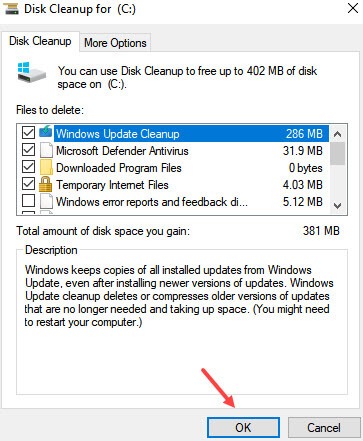
4. After the process completes, Restart your computer.
Run DISM Command to Repair Windows Update Components and Services
DISM or Deployment Image Servicing and Management is a command-line tool to resolve performance issues in your system. It is also called system Update Readiness Tool in Windows 7 and Vista. DISM command executes through Command Prompt to replace the corrupted system files using recovery image.
If your windows update medic service supporting files get corrupted or missing, it can also be a reason that your windows updating service not working properly and causes high memory and CPU usage. You can repair or get back the files by using DISM command.
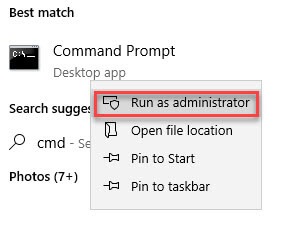
1. To run the DISM command type CMD in Windows search and open Command prompt as Administrator.
2. Then, type or paste DISM.exe /Online /Cleanup-image /Restorehealth and hit Enter to start the process.
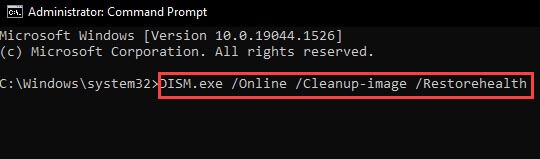
3. After that, the process can take some time to complete. If everything went well then it will repair or restore your windows update services and files.
If your windows Update Client is totally messed up and the above command doesn’t solve your issue, then type the following command in cmd.
Type DISM.exe /Online /Cleanup-Image /RestoreHealth /Source:C:\RepairSource\Windows /LimitAccess and hit Enter.

Quick Note: You need to replace C:\RepairSource\Windows with the location of the repair source.
Run System File Checker (SFC) to Repair Corrupted and Damage System files
If your Windows functions aren’t working, such as your Windows update stop working or Windows crashes. Then maybe this happen because your protected system files get corrupted for some reason.
1. You can fix this issue by running a system file checker command which replaces corrupted files with a cached copy that is located in an archive or compressed folder at %WinDir%\System32\dllcache.
2. Open Command prompt (CMD) as administrator and type sfc /scannow and hit Enter.
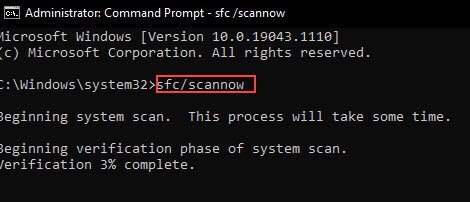
3. It takes some time to complete the process and if all goes well, it will show you “Windows Resource Protection did not find any integrity violations”. It means the system file checker didn’t find any corrupted and missing system files.
4. If it says “Windows Resource Protection could not perform the requested operation”. It means you need to run this command in Safe Mode. But make sure the ‘PendingDeletes’ and ‘PendingRenames’ folders exist in %WinDir%\WinSxS\Temp.
Add WaasMedic Agent.exe file to DEP to Protect Against any Security threats
DEP or Data Execution Prevention is a built-in Windows tool that provides an extra layer of protection to the windows files. DEP helps to protect its added files against damage from viruses and any other kind of security threats.
This Windows feature is very helpful to protect files from future threats and it might fix your high CPU and disk usage problem that happens due to waasmedic agent.exe.
Here you can turn on and add files to DEP:
1. Go to Windows search and type Adjust the appearance and performance of Windows and click on it to open.

2. Now, open Data Execution Prevention tab and select Turn on DEP for all programs and services except those I select.
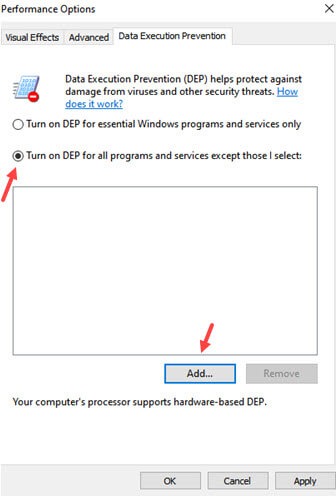
3. Then, click on Add button.
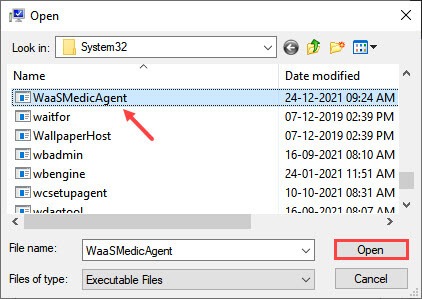
4. Now, search WaaSMedicAgent.exe application and click on Open to add the file to DEP.
5. After that, click on Apply and OK, then Restart your PC.
Quick Note: if you have 64-bit Windows, then maybe this method doesn’t work for you.
After PC restarts, check if WaaSMedicAgent.exe high CPU and Disk usage fixed or not.
Repair your System errors Automatically by using Third-Party Program
If you want to use a third-party program to fix any type of issue on your computer like waasmedic agent.exe High CPU usage or disk usage. You can use Windows Repair AIO setup tool.
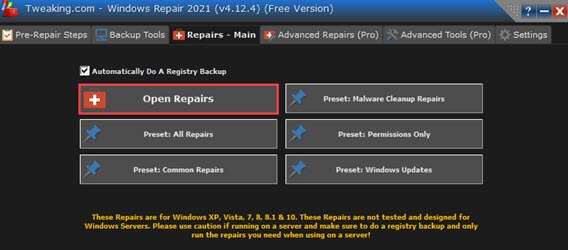
Windows Repair by Tweaking.com is a free all-in-one windows repair tool that can fix a lot of issues including Registry errors, Windows update errors, fixing windows after a malware attack, repairing system files, restoring original settings, and more.
1. Download and Install this software and click on Next Arrow until you reach to Repairs option.
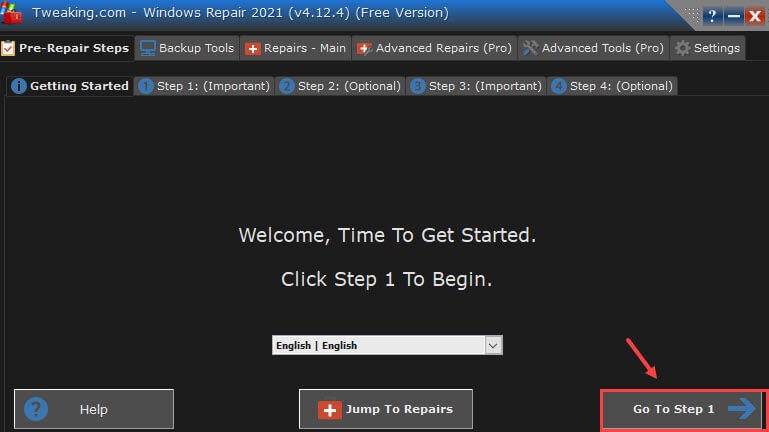
2. Then click on Open Repair to start the process.
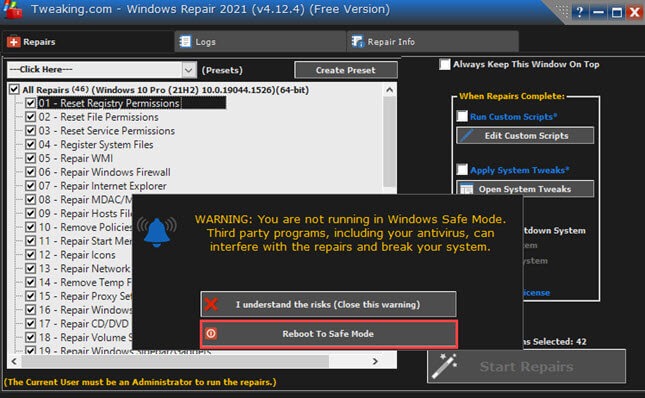
3. Then click on Reboot to safe mode to complete the process.
Upgrade your Windows to its Latest Version
Upgrading your Windows to its latest version is always a good choice. It’s not only fixing your system issue like waasmedic agent.exe high Disk Usage but also adding a lot of new features that add more value to your operating system.
Recently Microsoft releases Windows 11 come up with many useful features that fix a lot of issues that happened in previous windows 10. So, if your PC meets the minimum system requirement to run Windows 11, what you’re waiting for? Upgrade your Windows and say goodbye to problems that occurred on your previous Windows.
Upgrading system installs your windows from scratch without losing any data. To upgrade your Windows 10 to Windows 11, follow the given steps:
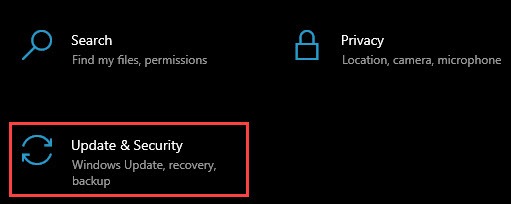
1. Go to Windows settings > Update & Security.
2. If your PC meets the minimum system requirement to install windows 11. You will see a message with a green tick that “This PC can run Windows 11”.
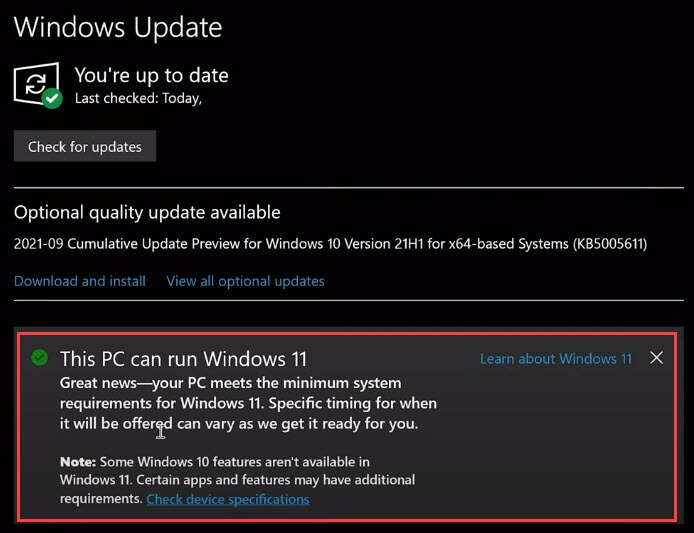
3. Now, you can go to the Microsoft site to download Windows 11 Installation Assistance.

4. After that, just follow the on-screen instruction to Download and Install Windows 11.

Can I Disable WaaSMedic Agent exe?
Disabling waasmedic agent.exe is not recommended. It is an application of Windows Update Medic Service that enable remediation and protection of windows update component and make your windows update smooth and uninterrupted.
But if you want to disable this service to fix high CPU usage of the system. You can disable this service by using Registry Editor and with the help of the Windows Updater Blocker tool.
How to Disable WaasMedic Agent exe to fix High Disk & CPU usage?
As mentioned above disabling waasmedic services and their processes is not recommended. This service is necessary to run your windows update steadily. But if this service uses 100 disks and CPU, you can disable this feature temporarily so the high resource issue can be fixed.
Two ways to disable windows update medic service are by using Registry Editor and with the help of third-party tool Windows Updater Blocker.
Task Scheduler and Windows Services method doesn’t work because waasmedic agent service is an essential part of windows update and it is protected by Windows Administration.
Disabling WaasMedic Agent exe by using Registry Editor
In this method, you need to disable this service by using Registry Editor. If you try to disable its service by Windows services you will get an Access is denied error message. It means this service is protected and you haven’t any permission to disable it by ordinary manual method.
Quick Note: Before tampering with the Windows Registry. I highly recommend backing up your registry to a safe location. For backing up, simply open Registry editor > click on File and select Export, and save the file to a safe location. If anything goes wrong with your Windows. You can Import this backup registry through Registry Editor and all registry settings will be restored to the previous state.
Just follow the steps to disable waasmedic agent service:
1. Go to search and type Registry Editor and Open it.

2. Now, follow this path or Paste it in path location after Computer\ HKEY_LOCAL_MACHINE\SYSTEM\CurrentControlSet\Services\WaaSMedicSvc

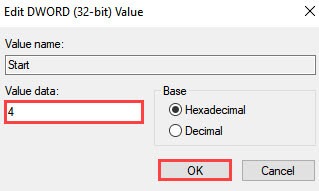
3. Now, click on WaaSMedicSvc folder and double click on Start to open the registry file on the Right panel.
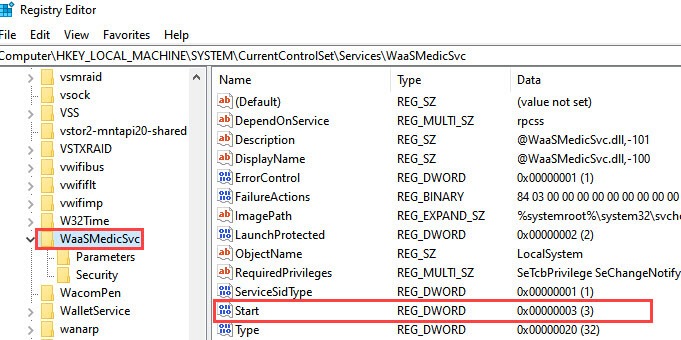
4. Now change it value from 3 to 4 to disable its service (in this registry file 0 = boot, 1 = Automatic, 2 = System, 3 = Manual, 4 = Disable)
Disabling WaasMedic Agent exe with the help of Windows Updater Blocker (Not Recommended)
If you don’t want to tamper or are not familiar with the Windows registry, you can use a third-party tool Windows Update Blocker to disable waasmedic service. I don’t recommend this method as using a third-party tool to force stop windows updates is not a good idea.
But if you want to use this tool then follows the steps:
1. Download this tool from its official site and Extract the Wub archive.

2. Open the Wubx64, if you have a 64-bit OS.

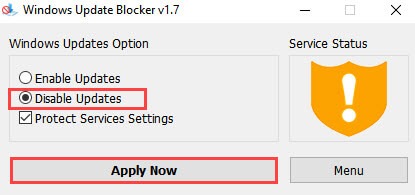
3. After that, select Disable updates, then click on Apply now button on the program to disable the wasmedic and other Windows update services.
4. Then, Restart your PC.
Quick Note: In the newer version of Windows Update Blocker tool you don’t need to add WaaSMedicSvc=3,4 line in Wub.ini file.
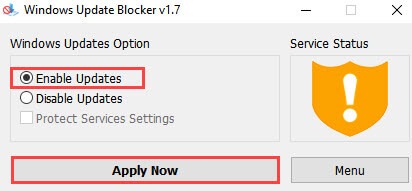
If this can solve your high resource usage issue then you can enable this service after some time through this tool.
1. Just Open the Windows update blocker tool.
2. Then, select Enable Updates and click Apply now.
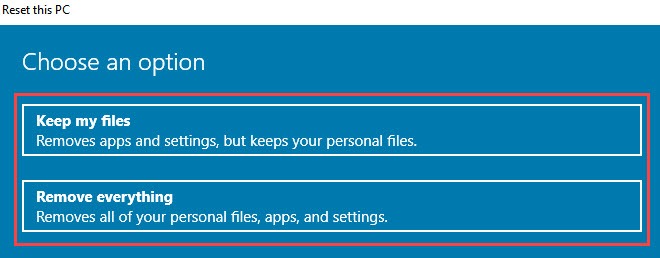
Reset the PC to fix WaasMedic Agent exe High CPU and Disk Usage
If Disabling waasmedic still doesn’t solve your problem. Then the last option left is to Reset your PC. You can select between Reset your pc without losing any data or Reset your pc by removing all your app, files, and settings.
WaasMedic Agent exe – FAQ
Can I End WaasMedic Agent Exe?
WaasMedic Agent Exe is an application of Windows Update Medic Service (WaaSMedicSvc) that provide a stable and steady environment for Windows update. This service cannot be disabled by ordinary manual methods but you can disable waasmedic service by using Registry Editor or with the help of a third-party Windows update blocker tool.
Is it OK to Disable the WaasMedic Agent.exe?
Waasmedic agent.exe is a vital windows update service that enables Enables remediation and protection of Windows Update components. Disabling this service may result in an interruption of Windows updates and corruption in Windows update files.
How do I fix 100% CPU & Disk Usage?
If 100 CPU and Disk usage issue is not associated with any program and service. You can fix this issue by limiting the windows background process with the help of Task Manager and System configuration, by cleaning unnecessary temp and junk files on the disk, resetting your PC Virtual memory, or scanning your system for viruses and malware.
Conclusion
WaasMedic Agent Exe is a necessary application of service WaaSMedicSvc. It is important for your windows update. But if you’re facing a high resource usage issue because of this service, you can upgrade your hardware or apply and modify windows component settings and disable its service temporarily to fix this issue.