
Many times it happens that even if we do not want to, some serious problem happened to our pc whether these problems mistakenly happened by us or any serious malware attack and this is a nightmare for those users who have very important data in computer and they are wondering about how to restore my system to previous date or earlier state without losing any data by the way Windows 10 has many useful features which get us out from very serious system problems but sometimes little technical knowledge is very helpful for us.
Windows 10 has a default system restore utility to restore your PC to previous date but some serious malware attacks or boot failure like Boot loop, Automatic system restart makes work much difficult in such situation different types of methods to restore or reset the system to its original state is also very helpful like Registry tweak, Safe mode, Windows backup, Reset this PC, CMD commands and Third-party software is also doing its job better if built-in system restores not working for some reason.
In this windows guide, we will see step by step different ways to restore a system even if you can’t access your Windows 10 screen.
Reset your Windows 10 to previous settings by Registry Backup and Restore
The Windows Registry is a hierarchical complete database of your whole system that stores low-level settings of your Microsoft Windows operating system and your applications and you can use this database to restore your windows settings to previous state.
If your computer works properly but due to some malware attack your system settings not properly configure anymore and also lots of error occurred then you need to simple registry restore to reset your pc but this method only works when you already have a backup of your registry before a malware attack or any system error.
If you don’t know how to backup your registry then simply export your whole registry to a safe location and that’s it and for doing this
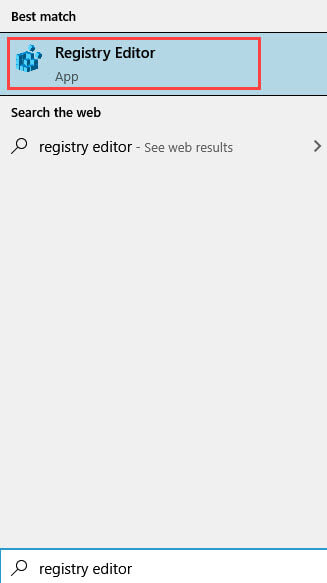
1. Go to Search and type Registry editor and Open it.
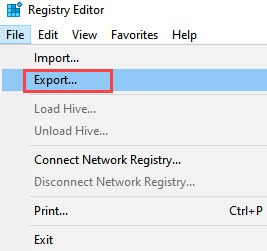
2. Then, click on Files tab and click on Export and Save your registry in a safe location.
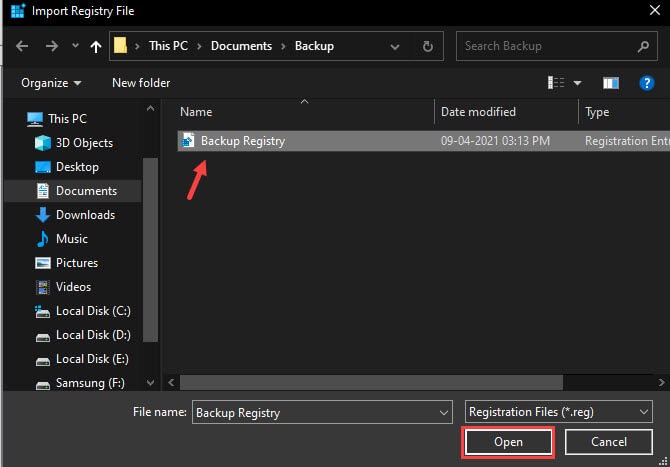
3. Now, if you have already a registry backup before a system failure or virus attack then again go to Registry editor and click on File tab and click on Import and import your backup registry from your save location.
And after that, all settings of Kernel, Services, Security Accounts Manager, Device drivers, and User interfaces are reset to previous state.
How to restore windows 10 by using Command Prompt
In case you can’t access your windows screen
If your computer stuck in Automatic Repair Loop, Infinite Booting, and Keep starting spinning dots forever then this method is might be helpful in restoring PC to its previous state basically, in this method we use cmd command to restore windows Registry settings so the system can be restored to its original state.
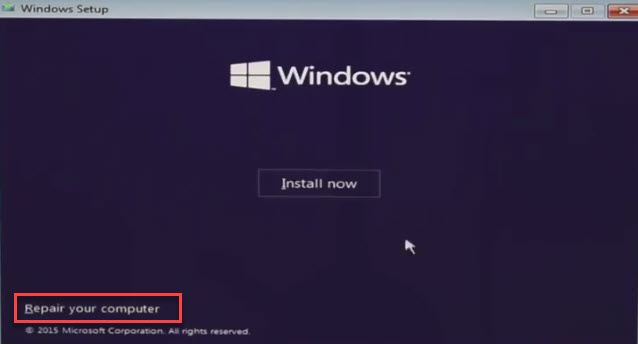
First, if you have Windows Bootable media then, you can enter in windows 10 advance option by Repair your computer option.
And If you have not Windows bootable media then, press your PC power button for 3 seconds till you observe your system shut down and then press the power button to turn on it and again press power button to shut down your computer repeat this process three times and then you see a screen something like diagnosing your PC and after that, a blue screen appears of Automatic repair.
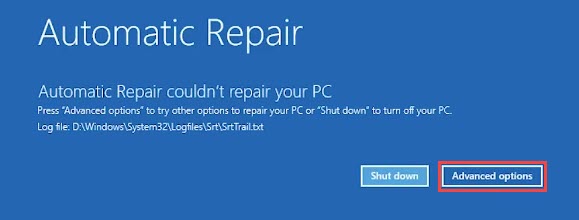
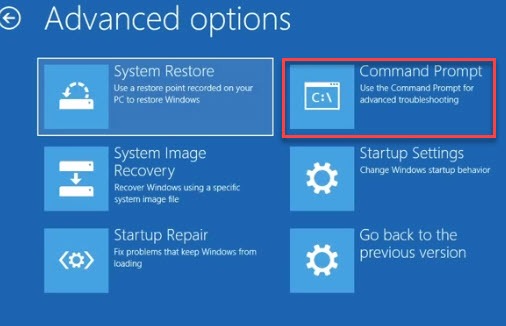
1. Then, click on Advance option and if windows ask for your account password then type your account password then, click on > Troubleshoot > Advance options > Command Prompt.
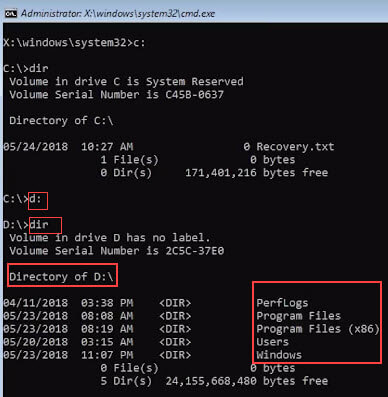
2. After opening Command Prompt, you need to find your System drive letter if you are not sure then
3. Type c: and hit Enter and then type dir and hit Enter if you find program files, program files (x86), User, Windows folder then you are in system drive and if not then repeat this command with another drive letter like d: then dir.
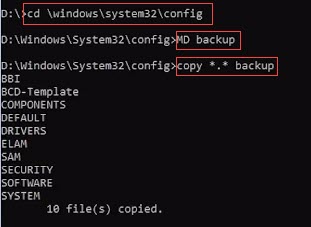
4. Then, back up your registry first type cd<space>\windows\system32\config and hit Enter.
5. Now, type MD backup and hit Enter.
6. Now, type copy<space>*.*<space>backup and hit Enter now your important files are copied.
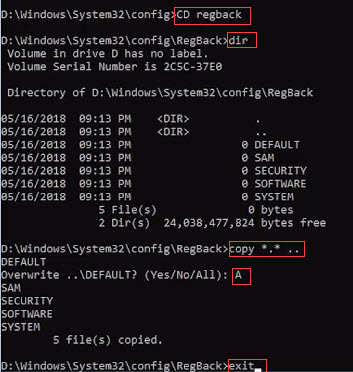
7. Then, type CD regback and hit Enter and then type dir and hit Enter.
8. Now you can see lot of items with some numbers if you see zeros before all items then type Exit and if you see numbers like 6 to 7 or 9 digits or random number etc. next to the items.
9. Then, type copy<space>*.*<space>.. and hit Enter then, type A and hit Enter and at last type Exit to exit cmd and Restart your PC.
After this, your system Registry configuration reset to last good configuration.
OR
In case you can access your windows screen
In case you’re able to access your windows screen then, first Keep pressing Shift key and with the help of mouse pointer Restart your PC it will automatically move you to Advance Troubleshooting option.
Then, click on Troubleshoot > Advance options > Command Prompt and then follow the above cmd commands and steps.
Restored windows by using default system restore utility
When you are able to access your Windows screen
The built-in system restore tool does its job very nicely if your system creates a restore point earlier.
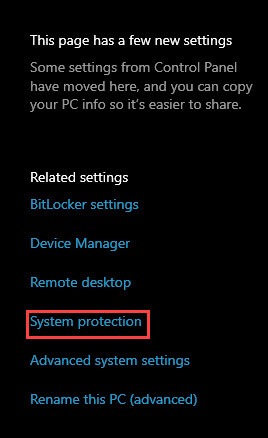
1. If you want to know how to create a system restore point then go to Setting > System > About and click on System protection.
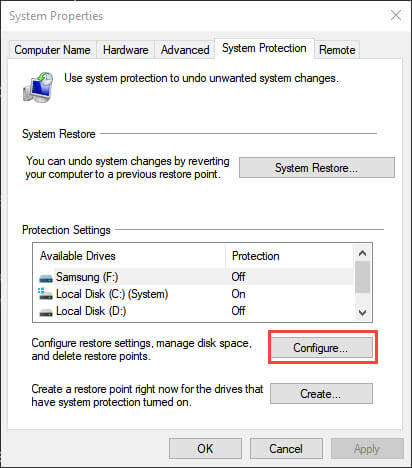
2. Now, click on Configure and then, Turn on system protection then click on Apply and OK.
Quick Note: Windows 10 automatically manage the space for system restore, but under the “Disk Space Usage” section, you can also use the slider to specify the storage amount.
3. Now, you can create a restore point by clicking on Create and enter a Name for your restore point and then again click on create.
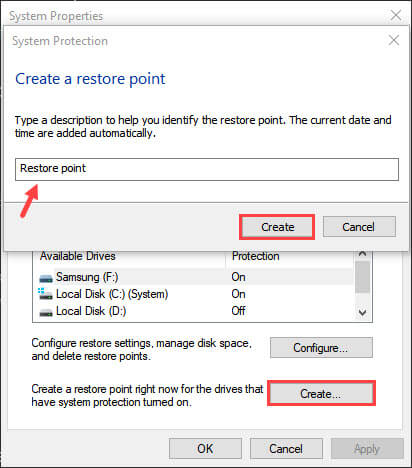
4. Now, a restore point successfully created in your system.
5. Now, if you have already a system restore point and want to restore your computer to the previous state then go to Setting > System > About and click on System protection.
6. This time click on System Restore and select your Restore point and click on Next and Finish.
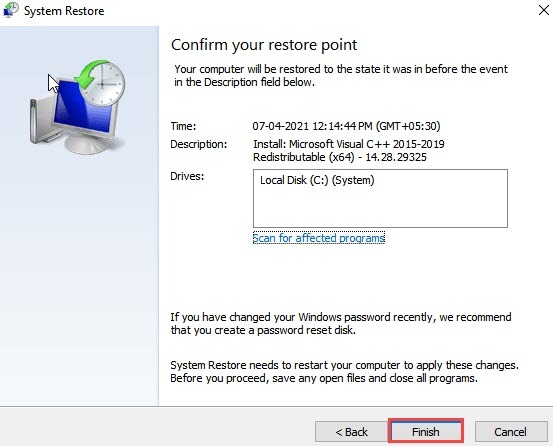
Once the system restore process completed your PC now in good state like earlier.
OR
When you are not able to access your Windows screen
Use Windows bootable USB or CD/DVD drive or System on/off trick three times as I mentioned above to enter in Automatic Repair blue screen.
Then, click on Advance option > Troubleshoot > Advance options > and Select System Restore and follow the above steps to restore your computer.
Restore windows 10 by using windows backup Utility
In case you are able to access your Windows screen
Windows backup utility is an advanced troubleshooting method because you can not only restore your PC but also transfer windows to another computer.
Before using this tool you must have a system image or back up of your windows if you don’t know how to create then follow the steps.
Quick Note: Remember that your external drive must be bigger than the size of your system drive data usage for system image backup. In my case my system drive used space is almost 12 GB so, I need a USB drive or external drive which is larger than the size of used space of system drive.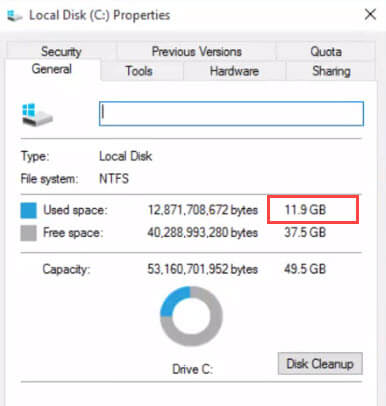
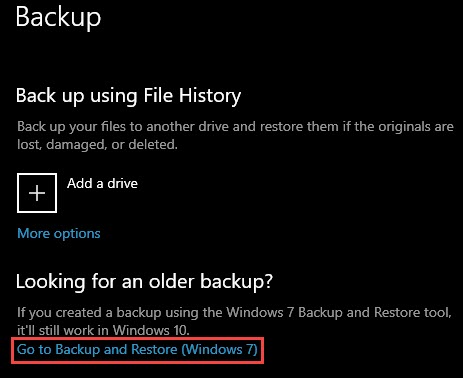
1. First, go to Settings > Update & Security > Backup and then click on Go to backup and restore (windows 7)
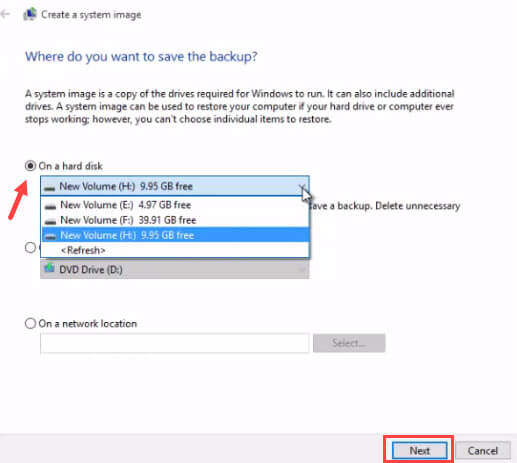
2. Now, click on System Image and Select a drive to back up the system image, and click Next.
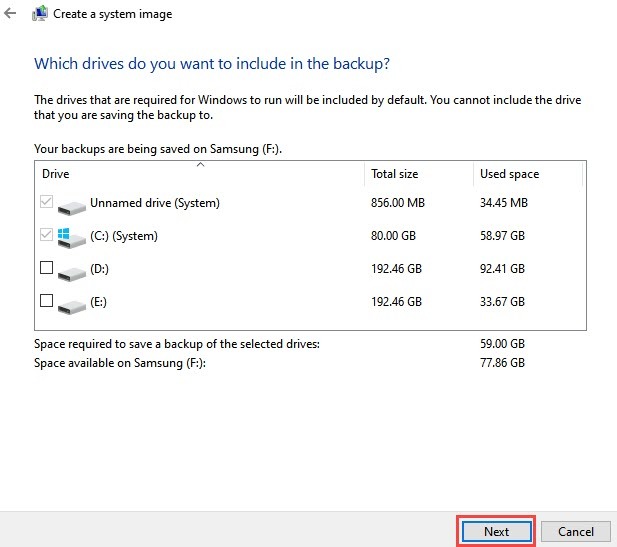
3. Then, select a drive if you want to include it in backup but this step is optional. Then, click Next.
4. Now, click on Start backup button to start the backup process and then select NO option for system repair disk.
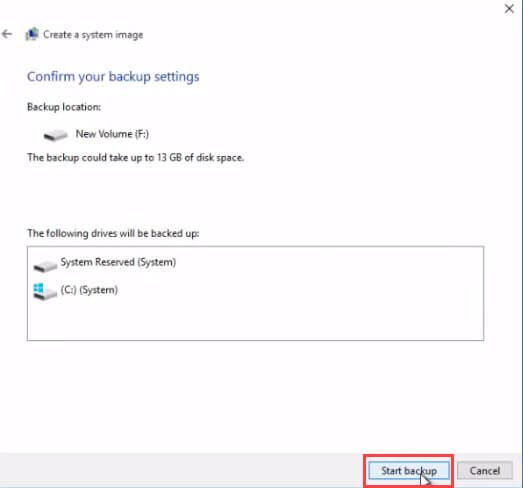
And after backup, you can close the backup windows and now you are successfully created a system image.
Let’s find out how to restore a system image windows file
If you are able to access your windows screen then you need to only Shift Restart of your PC to access Advance option. First Keep pressing Shift key and through mouse pointer Restart your PC it will automatically move you to Advance Troubleshooting option.
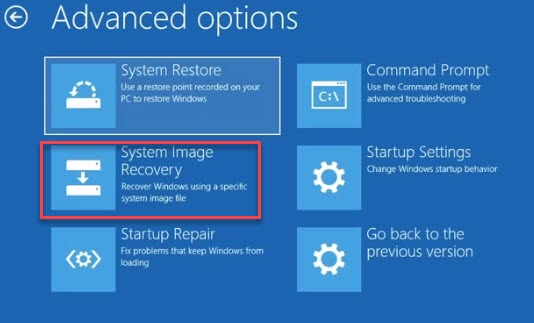
1. Go to Advance option > Troubleshoot > Advance options and select System image recovery then click Windows 10.
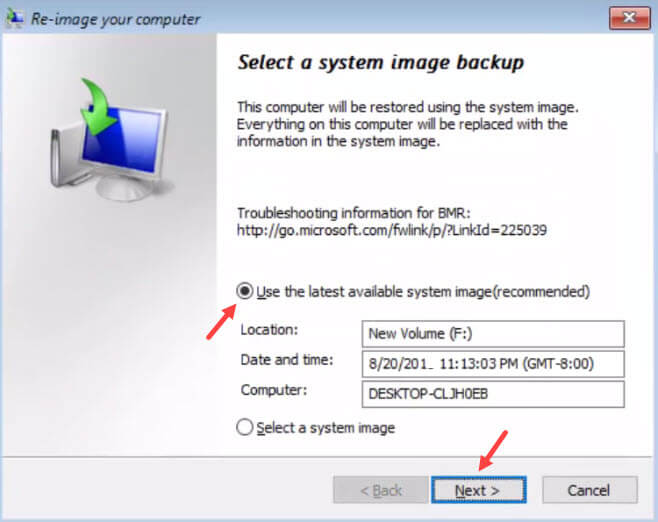
2. Click on “Use the latest available system image” it will automatically detect your external system image drive then, click Next.
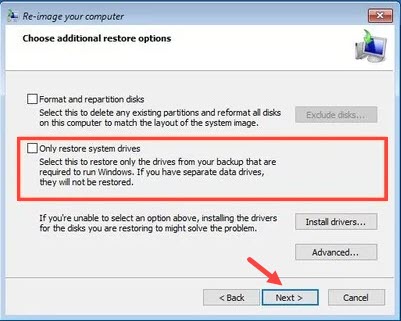
3. If you want to format the drive and again restore windows then, select First option and use the Exclude disks option to prevent formatting secondary drives that may contain data.
4. If you want to restore only system drive then select Second option.
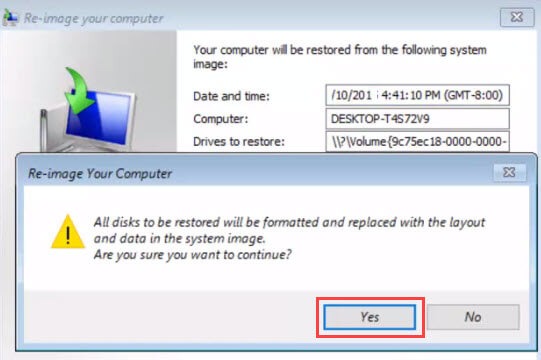
5. Now click on Next then Finish and Yes button to start the restoring process.
OR
In case you are not able to access your Windows screen
If you are not able to access your windows screen then Restart your system by bootable media or you can use power on/off trick to enter in Troubleshoot option as mention above
Then, click on Advance option > Troubleshoot > Advance options > System Image Recovery and then, follow the above steps.
Reset PC by using Reset this PC option of Windows 10
When you are able to access your Windows screen
Reset this PC is very useful utility in windows 10 by this tool you can easily refresh your system or fully reinstall the system like new.
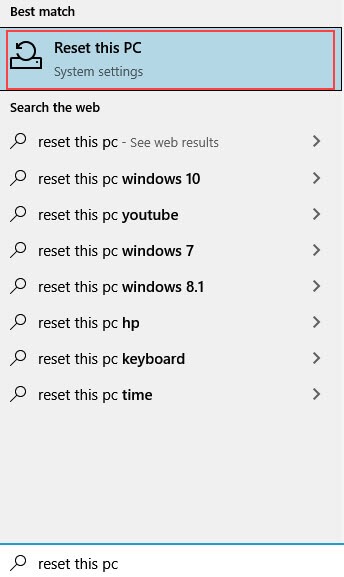
1. Go to Search and type Reset this PC and Open it.
2. Now click on Get started.
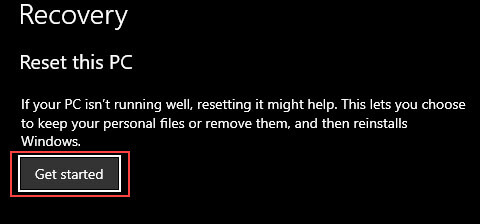
3. Then click on Keep my files.
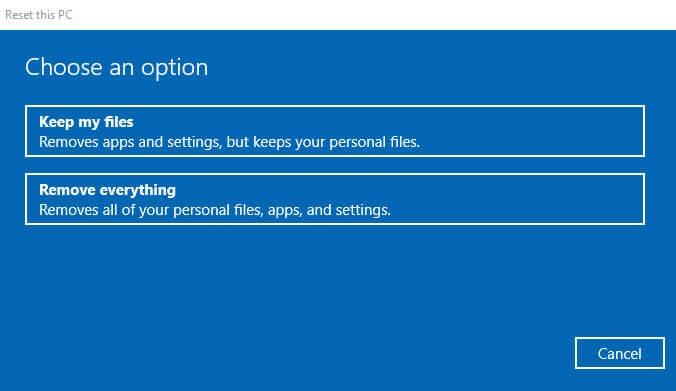
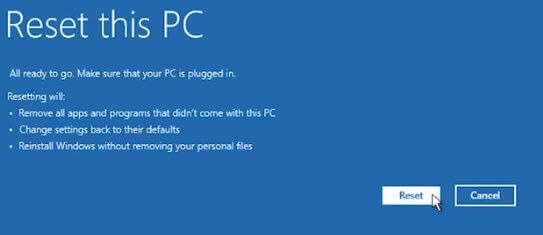
4. Then, click on Reset to start the process.
This option didn’t affect your personal files and data but give your computer a fresh start.
OR
When you are not able to access your Windows screen
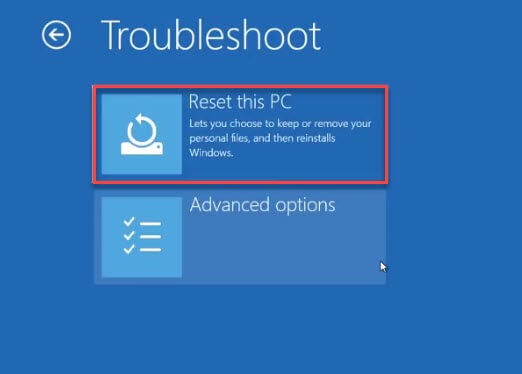
Start your pc into Automatic Repair by three times power on/off trick then go to Advance option > Troubleshoot >Advance option > Reset this PC
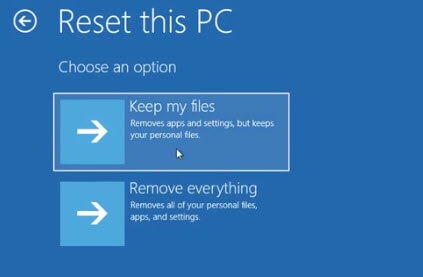
After that, click on Keep my files and then click on Reset.
Restore PC to previous or earlier state by using third party software
There are several ways to reset your pc to previous state and there is a lot of application to do that but now the software I am going to talk about is very secure and with this software, you will not need any antivirus product on your computer this software not only restore your PC without losing any data but also capable to protect your system with any kind of threat.
Deep Freeze by Faronics enhances your security and makes your computer immune to common problems like malware and accidental changes or deletion of important data. Deep Freeze also protects the master boot record from rootkit injections, making your security truly bulletproof.
This software frozen your system that makes your system secure to any kind of changes within the system and a simply reboot the machine and it will be returned to its desired configuration.
Deep freeze is paid software but you can use 30 days trial period.
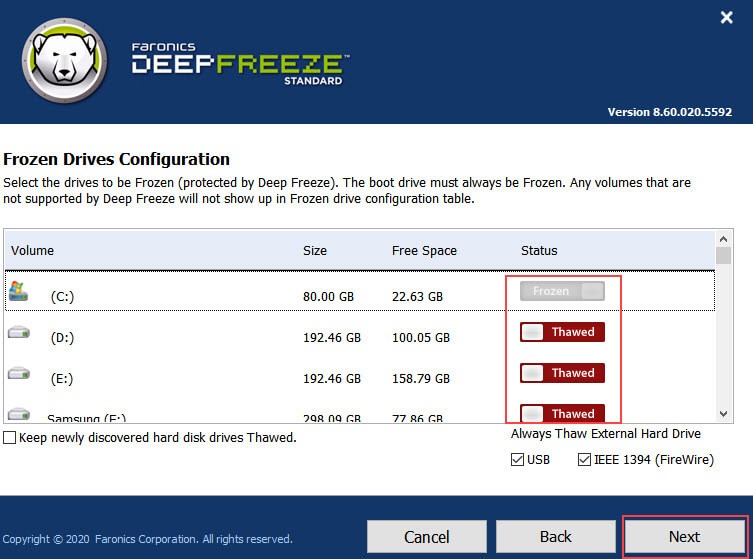
1. First, download and install the software and choose which drive you want to Frozen or secure, system drive is already frozen by default you can set the frozen state for other drives.
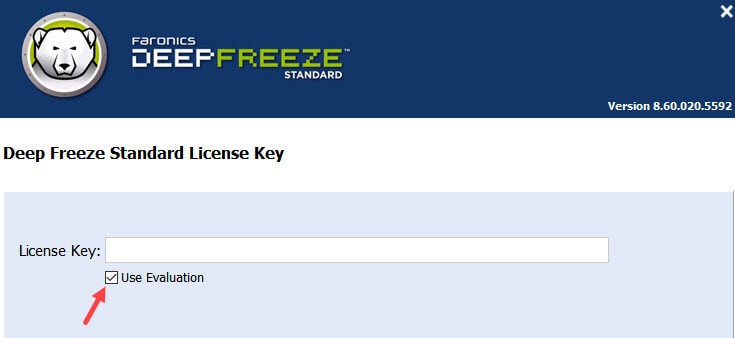
2. Then, enter the license key if you have or check on evaluation to start 30 days trial after installation, it will Restart your PC.
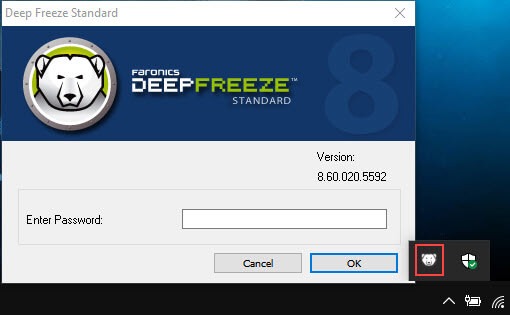
3. Open the software by Pressing Shift key and Double click on deep freeze Icon and Reset a password.
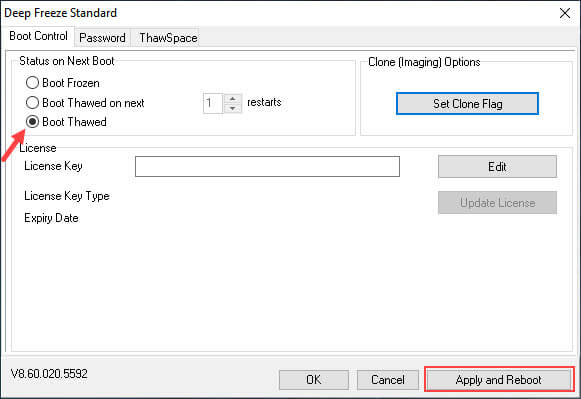
4. Then, there is three option on deep freeze screen.
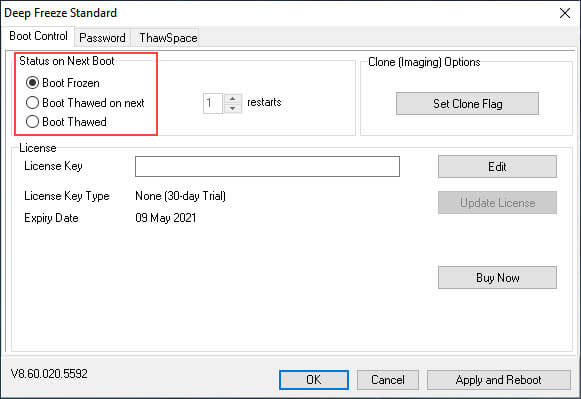
Boot Frozen -Frozen your disk or securing your disk.
Boot Thawed on Next – Stop protection after restart you can set restart number that protection will be stopped after how many restarts.
Boot Thawed – Stop protection of frozen drive.
After opening deep freeze your drive is in frozen state in this state you can’t be edit or delete anything on frozen drive if you do then, after restart all your work are gone because in frozen state you cannot modify any changes to frozen drive and this state protect your frozen drive from any kind of threat.
5. If you want to stop the frozen state you can check on Boot Thawed and click on Apply and Reboot the PC.
How to Uninstalled this software
Uninstalling this software is not simple as other software you must be kept in mind these things:
You can only be Uninstall this software if the deep freeze software is in Thawed mode not in Frozen mode.
The software is hidden from all uninstallation software or utility so you can’t be uninstalled by windows built-in uninstaller or any third-party software.
For uninstallation, you need to Open the Setup of this software. The setup automatically detects whether deep freeze is installed on your system or not if software is installed then the deep freeze setup shows you an option of Uninstall.
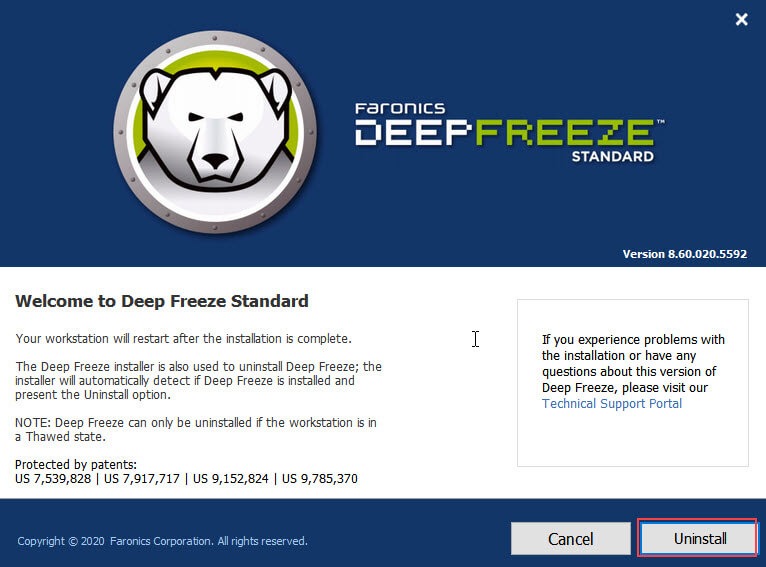
Click on Uninstall button and it will uninstall your software successfully and Restart your PC.
You may also like:
- How to recover permanently deleted files from recycle bin in Windows 10
- Best way to login to Windows 10 without password
- Best way to fix (BSOD) Blue Screen of Death in Windows 10
Conclusion
Some Malware infection or any critical error or by our own fault sometimes we need to restore our system to its original state and Windows 10 default system restore utility is more than enough but if this tool did not work for you then you can reset or restore your PC by different types of method depending on your situation which I explained in this guide.