If you worried about the security of your data, here is the detailed guide of windows 10 encryption method.
We all know that, how to try to steal our data, our important documents, information in today’s time and the way we are trying to upgrade technology in this modern world, on the other hand, this technology is also misused by some bad guys for our data theft through ransomware, malware and other Brute force attacks.

Huge density of world uses Microsoft windows for desktop or laptop and its really popular and provide best security for user to share information without any trouble.
But in case we have more sensitive data on our computer we need some extra layer of protection to protect our data more securely. Basically, we need to encrypt our data so no one can read.
Encryption is a method by which we make our data unreadable to other and it only be read through a particular password or device. So, what we need to do for our data encryption? Well, Microsoft windows provide best encryption technique to encrypt our data by BitLocker, EFS (encrypting file system) and today we will learn about it.
What is EFS (encrypting file system)?
EFS is a feature which available in all business and professional edition of windows. It enables transparently encrypted of your data, it is easy to use but it only secure folder or files, not a whole Drive if you need to secure your whole drive from hackers you need BitLocker feature which amazingly protect your files.
What is BitLocker encryption and how does it work?
It is full disk encryption feature of windows which first introduced in Microsoft windows vista this feature is basically designed for full disk drive encryption. It uses AES (Advanced Encryption Standard) algorithm in CBC and XTS mode. It not only encrypt your computer Hard Disk but also encrypts removable drives. It available on different version of windows like:
· Ultimate and Enterprises edition of window vista and window 7
· Pro and Enterprises edition of Windows 8 and 8.1
· Windows 10 Pro, Enterprises and Education edition
· Windows server 2008 and other
Initially, BitLocker introduces in window vista and windows server 2008 which only able to encrypt windows installation drive but later new version of BitLocker in windows 7 and windows server R2 support encryption of removable drive.
In this guide, we will know about BitLocker encryption in windows 10 but before we start we need to know some basic points of this feature which are necessary.
1. Before using of BitLocker our PC or Computer should be equipped by TPM 2.0 chip (Trusted Platform Module). This is a device which enables the support of advanced security features.
2. If your computer have no TPM chip so don’t worry it also supports some other mode to encrypt data like Password authentication and USB key mode.
3. Your PC BIOS must support TPM or USB key mode during startup, so check your firmware BIOS or update your BIOS if available.
4. Your PC have two partition one which contains necessary file to start windows and another in which your windows installed. If anything missing BitLocker create them.
5. This process is some time consuming depending on your data size.
I recommend you to backup your data, so even if any mistake happened during any steps, our data remain safe. So, let’s start windows 10 encryption with BitLocker step by step.
How do we know if TPM chip present in our system
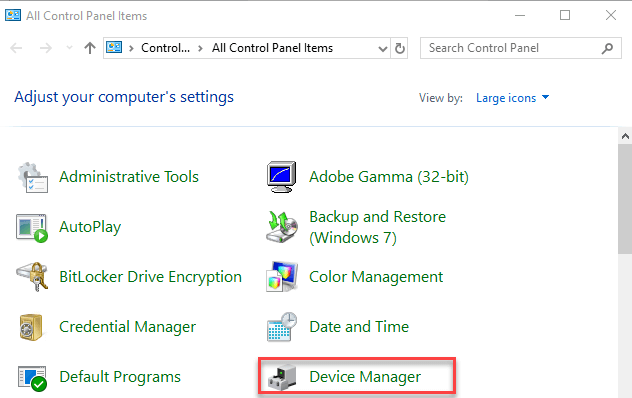
1. Simply go to your control panel and find Device Manager.
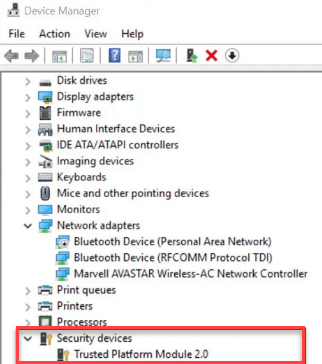
2. Open it and expand the security devices, if your device have TPM chip then one item should be there as Trusted Platform Module with version number
How to setup settings to turn on BitLocker without TPM
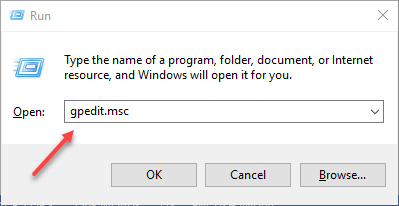
1. Press Windows + R key to open Run command and type gpedit.msc and click OK.
2. Under computer configuration expand the Administrative Templates.
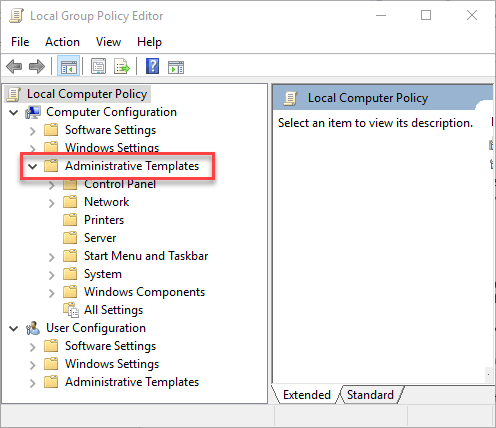
3. Expand windows components then expand BitLocker Drive Encryption and click on Operating system Drives
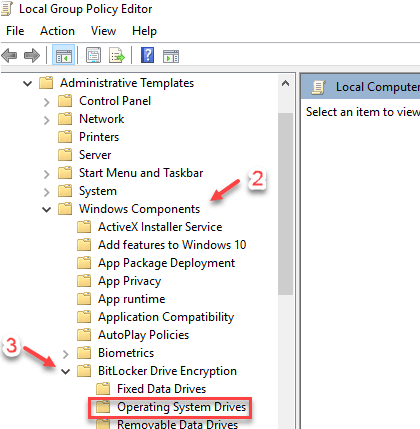
4. On the right side double click on require additional authentication at startup
5. Then select enable and check the “Allow BitLocker without a compatible TPM (requires a password or a startup key on a USB flash drive)”.
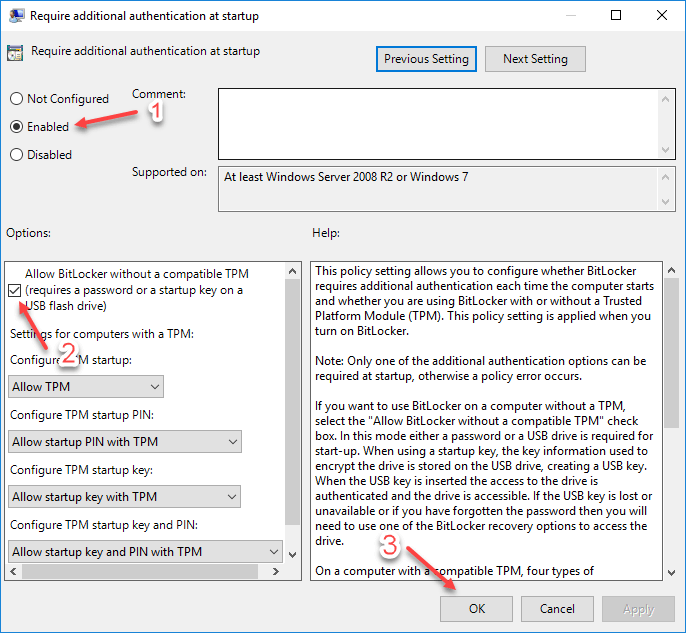
6. Click ok to complete the process.
Now let’s enable this feature for Windows 10 encryption.
How to turn on BitLocker on windows installation Drive
1. Press windows key + R key to open Run command and type control panel to open control panel

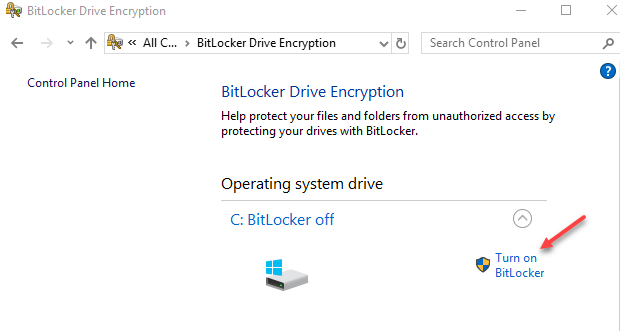
2. Click on system and security and then click BitLocker Drive Encryption.
3. Then click turn on BitLocker and click Next
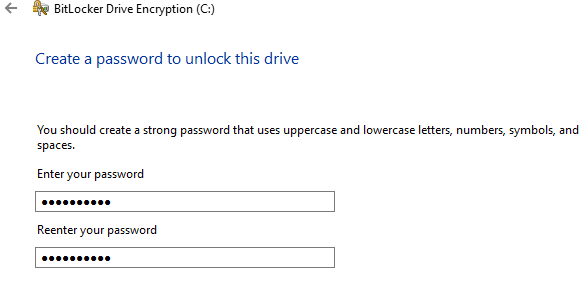
4. Choose “how you want to unlock your drive during startup” and Insert a USB or removable Drive or Enter a password.
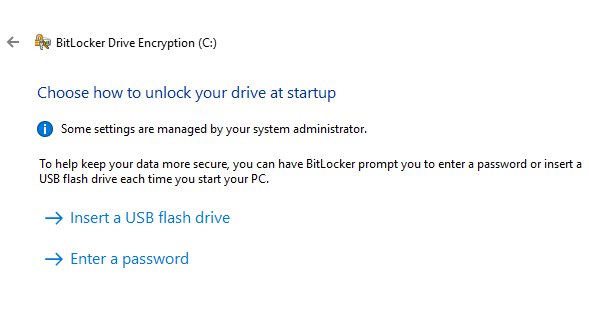 5. After selection to unlock your drive during startup, enter password if you choose Password option or insert a USB if you choose flash Drive option and click Next
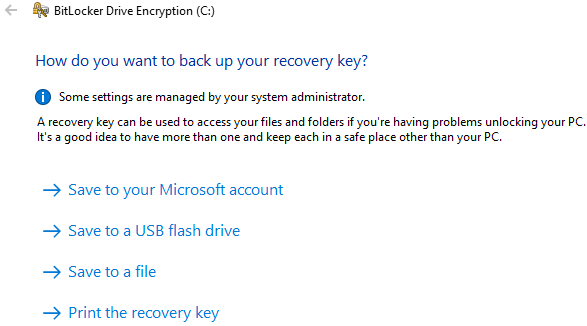
 6. In this step you need to select “how you want to backup your recovery key”, there are four option select any option according to your convenience.
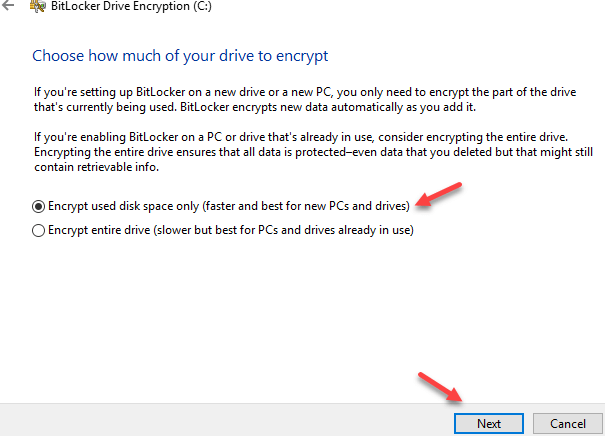
7. Now, choose “how much of your drive to encrypt” and I suggest you to choose first option “Encrypt used disk space only” then click Next
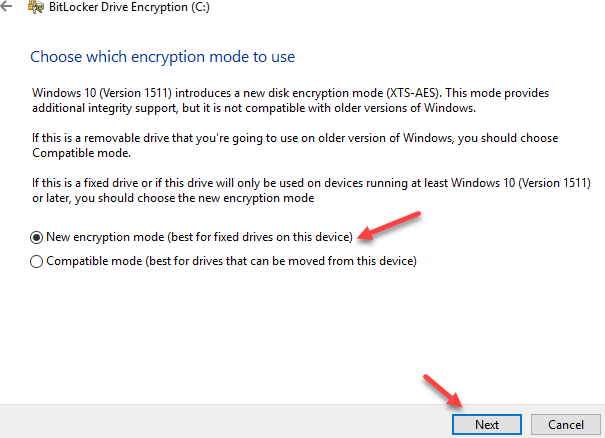
8. Now, choose between two encryption options, we turn on BitLocker for windows installation Drive so, choose New encryption mode for fixed drives and click Next.
9. Make sure to check Run BitLocker system check and click on continue
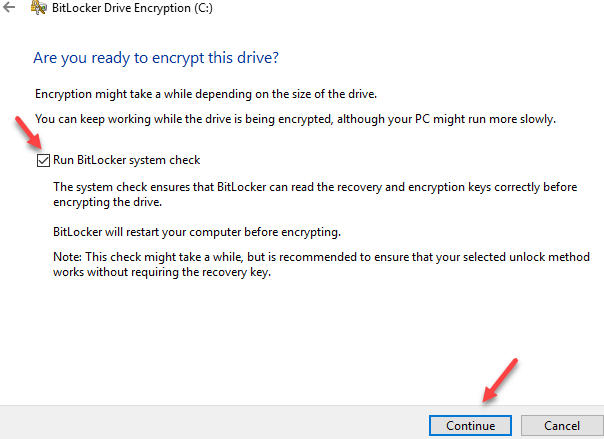
10. Finally, restart your system to check the encryption process and enter password if you choose password or insert your flash drive
11. Once the BitLocker process complete the drive level should be BitLocker ON or you can see a lock icon in your C: Drive or where your windows install.
![]() 12. If you want to turn off this feature follow the previous first and second step and then you see an option of turn off BitLocker and click on it.
12. If you want to turn off this feature follow the previous first and second step and then you see an option of turn off BitLocker and click on it.
How to turn on BitLocker for rest of the Drives
Follow the previous first and second step of “turn on BitLocker on installation drive” and then choose Drive which you want to lock and turn ON Bitlocker for that Drive then
1. Choose a strong password and click next to continue.
 2. Now again “you need to select how do you want to backup your recovery key” like previous one after choosing click Next

3. Now, choose how much of your drive to encrypt and select first option “Encrypt used disk space only” then click Next

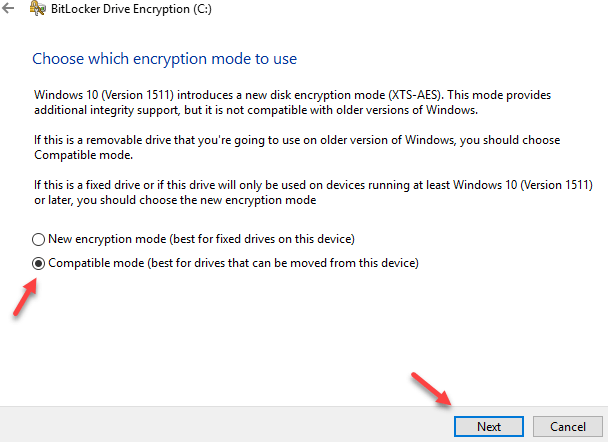
4. Select between to encryption option and this time select “Compatible Mode” then click Next
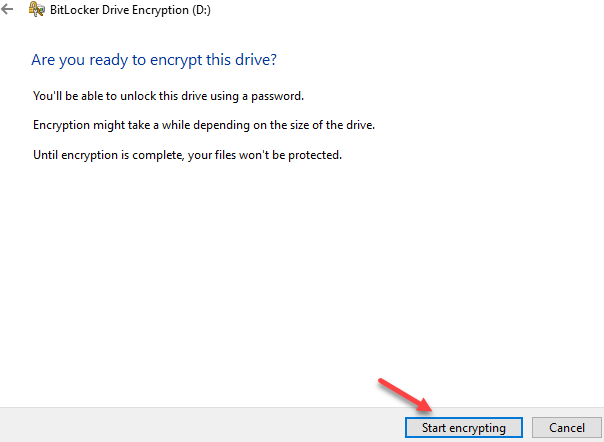
5. Now click on start encrypting and Done
You can get quick access to BitLocker setting by Right click on your Drive and select Manage BitLocker.
Conclusion
We all know that security is a major factor to protect our data, information and our privacy. In this guide, I tried to explain some mandatory feature of BitLocker for Windows 10 encryption and for another version of windows. In today’s time, security is necessary for our files, especially for more sensitive files and this feature, is capable of providing protection by encryption method to it.
Tells us which security you use to keep your data safe through comment.
If you like this post so don’t forget to share.
